
Modernisation Part 1: The Old Method
Modernisation, the process of updating and improving a process with the aim of making it better, be it more accurate or more efficient. One of my main goals at DAME is to see how we can improve on our old production methods and what additional tools or processes might be needed to do so.
Fortunately, the optimisation and automation of processes was also part of the work I did before helping to found DAME, so I have a lot of experience to draw from. However, as that experience is primarily focused on engineering, I have been adapting it to suit our needs and make our production methods more efficient without restricting our artistic freedom.
As this is not the easiest subject to cover, we will be breaking things down into smaller parts in order to explain our plan and thought process clearly. As such, this will be the first of 4 blog posts that we have planned:
- The Old Method
- Options for Improvement
- What We Have Done
- Linking It All Together with Mask Generations
The Old Method
Before we can look at improving a system, we first need to understand the system itself. Emily has been making masks for a very long time and is by far the most experienced within DAME at doing so, though one of the major issues she highlighted was how laborious and time consuming the whole process was. As such, one of the main goals we agreed on when founding DAME was to improve upon the process of making masks as much as possible by working together as a group and pooling all our knowledge together.
Below we will break down the old mask making process, as described by Emily from her time before DAME, however we are unsure if it has ever been followed exactly since forming DAME, as we almost immediately started to make adjustments.
Design
The process started with a polystyrene head and a lot of clay, then through lots of time and effort, the mask design was sculpted by hand. The primary focus was on creating a visually appealing sculpt, ensuring that subtle imperfections were incorporated to avoid making the face perfectly symmetrical, as asymmetry is important for avoiding the face having an “uncanny valley” effect.
Whilst references were sometimes used if there was a specific character or design in mind when creating the sculpt, the sculptor was often left to create the design as they went, occasionally stopping to get feedback and make changes as they saw fit, all whilst hoping the clay remained moist enough to be worked on further.
The mouth design and eye positions were then drawn up, with a front-on picture of the sculpt used as template to ensure all facial features were correctly proportioned, as well as to create a mock-up of what the finished mask might look like. From here, the finished mock-up was used to help design more detailed eye graphics that were ready for printing.
Pre-Manufacture
Once the design is finalised, the clay sculpt is first left to set, then sanded to get the surface finish as smooth as possible and remove any unwanted imperfections. The finished sculpt is then used as a base to create a two-part silicon jacket mould, which itself was often enclosed in a hard, external shell to prevent the mould from becoming damaged or deformed.
The completed mould was then used to create a test mask shell which, if everything went well, would simply be ready to use as-is. Occasionally however, it would not, and the test shell would then be used as the base for a second mould, with further work being done to smooth out and modify the mask shell as needed.
Manufacture
After the mould had been finished up, it was then used to create a final mask shell using hand layup, a technique that uses resin to bond sheets of fibreglass together. An initial layer, known as the gel coat, is first applied to the inside of the mould and left to partially set, then one by one the sheets of fibreglass are coated in resin and layered on top of each other until they cover the gel coat. Once enough layers have been built up, the shell is left to set before being removed from the mould.
Provided there were no abnormalities during the above process, the shell was then ready for use. First, in order to prep it for painting, the excess fibre glass was cut from the edges of the shell so that it was ready for sanding, lots and lots of sanding. This part of the process was mostly done by hand, with a mouse sander often used on flatter areas of the shell, and usually took at least 6 hours to complete.
Next came eye holes and the mouth. Once the surface finish on the shell was satisfactory, a small paper template was used to mark up where to cut the shell, allowing for the shape and positioning of the eye holes to be determined and tested before any cuts were made. A rotary tool with a small cutting disc was first used to cut out the larger shape, with a small sanding drum then being used to neaten up and fine-tune the shape as much as possible.
The mouth on the other hand was not as precise, as it was instead sculpted from scratch every time. A larger hole was first cut out of the mouth area using the rotary tool before modelling putty was used to fill it back in and shape the mouth, with further sanding needed to smooth it nicely into the rest of the shell.
With the shell finished, it was then time to paint it. Primer paint was first used to ensure the shell was a single solid colour, occasionally highlighting any remaining imperfections that were missed previously. Once any adjustments were made and the primer had finished being applied, the main skin tone paint was finally added, followed by the makeup and clear sealant to protect the paint.
Decorating
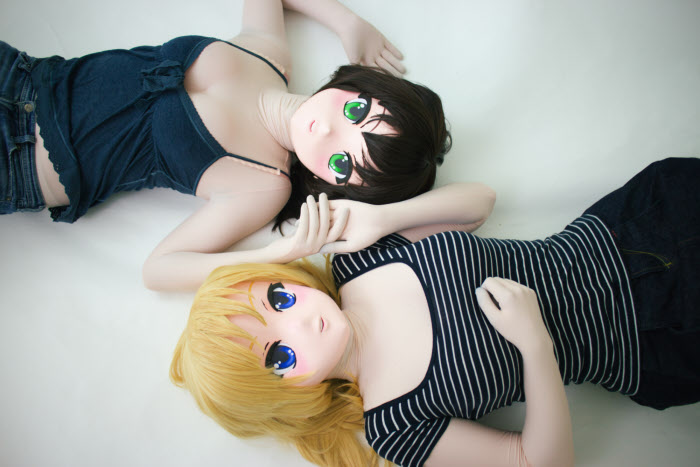
With the shell painted, it was then time to add the remaining features, namely the hair, eyes, eyelashes, eyebrows and padding.
This usually started with multiple, different sized versions of the eye design being test printed to see which fit the eye hole best, with only the chosen size printed on the correct material. The vision ports were then cut out, with either scissors or a knife, and a water-proof sealant was added to protect the ink. Once the sealant had set, the eyes were used to mark up some EVA foam that was then cut and glued, along with some black mesh in the middle to help hide the vision ports, to the back of the eyes.
Before the assembled eyes were stuck into the mask however, the eyelashes and eyebrows first needed to be prepared. A template of the eyelashes was first printed and stuck to some EVA foam, or occasionally marked up directly onto it, whilst the eyebrows were simply printed directly onto adhesive vinyl. After they were both cut out, the eyelashes were attached to the shell first, followed by the eyes and eyebrows.
After the eyes were stuck in, the padding, made from a large sheet of foam cut into different sections, was then glued to the inside of the mask. To allow for some adjustability, there were extra bits of removable foam added in addition, in order to accommodate for different head sizes.
Lastly, the wigs where then cut up and glued to the mask before the face was temporarily covered with cling film, so that the paint and eyes were protected from any hair styling products used. The hair styling was done using a combination of cutting the hair, hair spray and styling gel, with additional techniques like backcombing being used for more complex hair styles. Once the styling was finished and any product used was set, the cling film was carefully removed from the finished mask.
Conclusion
In summary, our old production methods were very inefficient, as not only were many of the processes involved extremely time consuming, they were also quite costly and inconsistent as everything was done almost entirely by eye.
Additionally, the fact that some features where purposefully omitted from the mould, in order to make the design process more flexible, meant there was no easy way to get a good idea of what a mask might look like until it was too far along in production to make any substantial changes. This in turn led to a lot of added stress when designing a new mask, for both the maker and the customer.
Back when kig was an even smaller niche in the west than it is currently, the old production method made sense, as at the time it was almost cutting-edge with regards to the materials and processes involved. Plus, there were drastically fewer orders to process, so there was more time to spend on each individual mask.
However, technology has moved on quite a ways since then and many aspects of this old method have since become almost obsolete, as a mask of equivalent or greater quality can be produced in substantially less time, even with the limited changes we have made so far. As such, we are now looking to further improve our production methods by incorporating new technology.
Our next blog post in this series will be covering some this new technology in more detail and how it will affect the way we work, the benefits associated with it, as well as any potential drawbacks it might have. Oh, and we promise the next one won’t just be a big wall of text. Stay tuned!