
Modernisation Part 3: What We Have Done
Modernisation, the process of updating and improving a process with the aim of making it better, be it more accurate or more efficient. One of my main goals at DAME is to see how we can improve on our old production methods and what additional tools or processes might be needed to do so.
Fortunately, the optimisation and automation of processes was also part of the work I did before helping to found DAME, so I have a lot of experience to draw from. However, as that experience is primarily focused on engineering, I have been adapting it to suit our needs and make our production methods more efficient without restricting our artistic freedom.
As this is not the easiest subject to cover, we will be breaking things down into smaller parts in order to explain our plan and thought process clearly. As such, this is the third of 4 blog posts that we have planned:
- The Old Method
- Options for Improvement
- What We Have Done
- Linking It All Together with Mask Generations
What We Have Done
Now that we’ve gone through our old method of mask making and the ideas we have to improve it, it’s time to talk about which of those ideas we have tested and our experiences with doing so.
It may surprise you to learn that we have actually tested most of the methods listed in our previous blog post; whilst we haven’t tested Roto Casting, Vacuum Forming and Laser Cutting as methods of mask making, we do have some hands-on experience with both Vacuum Forming and Laser Cutting.
Standardisation
From the very beginning, we’ve had ideas and plans on how we wanted to standardise the options we offer to try and reduce the amount of time it takes to produce a mask. This resulted is the current Generic Mask range, consisting of three different styles that can have all work necessary to prepare them for being painted done in advance, before any orders are placed.
The way we produce the eyes for our masks has been standardised using templates to help make the eye backs more uniform, meaning it is easier to produce them in bulk or even in advance of orders being placed.
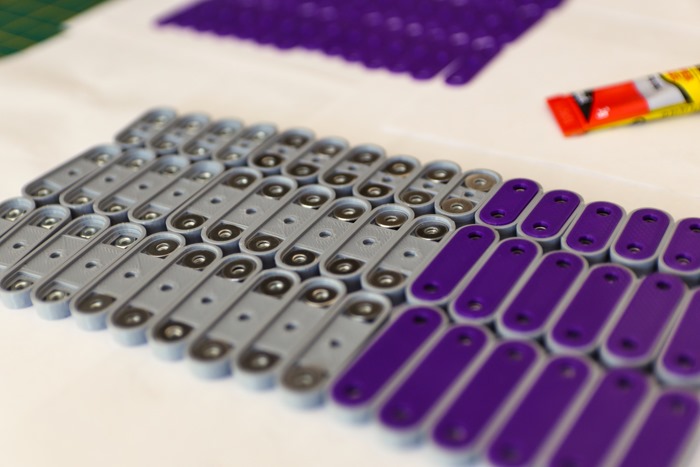
Padding sets and backplates have been standardised. Padding sets are put together in advance as a kit and stored ready for a sale, whilst backplates are painted on demand, with the rest of the kit being pre-assembled months in advance ready to be added to the finished backplate.
We have even investigated making our own tools to cut out the eyelashes, with the original plan being to use a cookie cutter-like tool to stamp them out easily and quickly. However, this turned out to be too hard of a task, so we instead decided to look into cutting machines as an alternative, partly as they could also be used to produce non-standard/custom designs as well.
We have yet to reach a balance between standard and custom options that we’re happy with, as there are pros and cons on both sides. On one hand, it has been very beneficial for us as a group to standardise everything possible, as it has greatly increased our capacity and allowed us to charge a competitive price while still earning enough between the 3 of us to make the work we do worthwhile.
It has also led to some challenges, such as having issues with storing the large quantity of shells we were able to produce, though the main challenge that we’ve found is how heavy standardisation has somewhat limited our creativity. There have been instances when we wanted to make something or take on a project but decided not to, due to the amount of work involved in deviating heavily from our standard designs and templates. In other words, we have ended up being less flexible with regards to the kinds of projects we are willing to take on.
We are currently trying to work on a way to retain our reliance on standard designs, in order to keep costs and production times as low as we can, whilst also being more flexible with the kinds of custom options we offer for our masks.
Cutting Machines
We have recently been looking into these and feel that a laser cutter is not the way to go. We have not tested one as part of DAME, but we do have some previous experience with laser cutting. Based on that, we feel it would only be able to perform half the tasks we would want it to do, with the main issue being the inability to cut anything printed without scorching the edges of the cut, meaning it could not be used for eyebrows or irises.
Looking closer at cutter plotters, there are a couple of machines that are more specialised and aimed at hobbyists. These can accept a large range of different materials, as they instead work by using a sticky cutting mat that you attach the material to before feeding it into the machine. We have gone with the Cricut Maker 3, that claims to work with over 300 different materials and has a working area of 12” x 12” when used with a standard size cutting mat. Alternatively, it can be used with an extra-large cutting mat or the special “smart” materials sold by Cricut if a larger working area is needed.
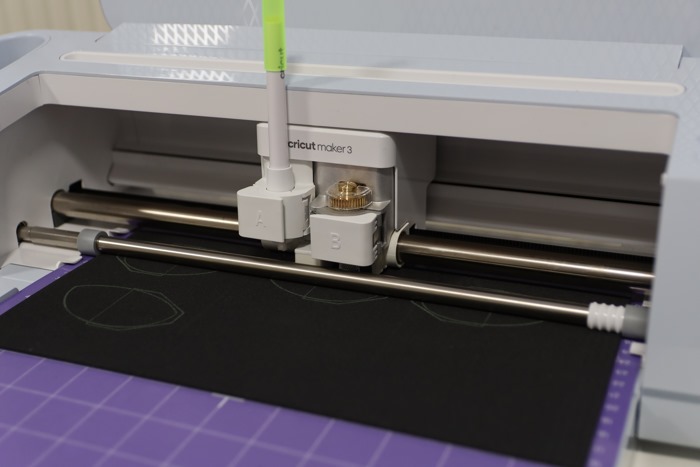
So far, we have made many significant improvements to our workflow using the cutting machine, though we are still in the process of testing the limits what it can do. We’ve successfully used it to cut out eyelashes, as well as the foam backing used for the eyes, and have transitioned to using these on our masks, as we have found the quality of the cuts to be both accurate and consistent. It also has the added bonus of being around 50x faster than cutting them out by hand.
Whilst we still need to experiment further, we have many plans for switching over to using this machine where possible as, if everything goes smoothly, it will allow us to start offering more options to customers whilst also helping to keep costs down.
3D Modelling
As highlighted in our previous blog post, we feel that 3D modelling is, and will continue to be, integral to the development of our products as we move forward. Between the members of DAME, we have varying degrees of experience with 3D modelling, from engineering to games, so we have a great deal of knowledge and different skills to make use of.
We use a mixture of different software depending on the task at hand; AutoCAD is used for things that require engineering know-how like the nut holders for backplates, whilst Maya is used for projects like mask accessories that often include more complex shapes and features. Lastly, Blender is sometimes used for projects that involve more organic/sculpted shapes, such as animal ears. Blender and Maya are fairly similar pieces of software, so which is used is also largely dependant on who is doing the work.
Between the three of us at DAME, we each know how to use one of the above pieces of software fairly well, however that means passing models between us can be a bit challenging at times. To ensure that quality is maintained whilst keeping the model in a state that is easier to work with, we export models in fbx format where we can, whilst models intended for 3D printing are exporting in stl format. Fbx format retains much of the model’s information and keeps it in quads, which is ideal when working in Maya and Blender. Stl is a commonly used format for 3D printing, largely as it can be used to ensure the model is scaled correctly without retaining any other unnecessary information.
3D Scanning
We have tried various different methods of 3D scanning objects for use with 3D modelling and printing. Photogrammetry is one of the methods we tried, though we found it doesn’t work well on masks due to their uniform nature. To improve the input images, we tried instead using a video by extracting every 3rd frame, and while this did improve the quality of the model, the end result was still not fit for purpose.
We have had one of our shells externally scanned in the past which worked well, however when we looked into doing it again years later, we found it hard to find a company that could do so for us at a reasonable price. The quality of the externally scanned model was good, though it needed a lot of clean-up before it could be used as a base to design accessories on, as the surface was heavily pitted and not smooth.
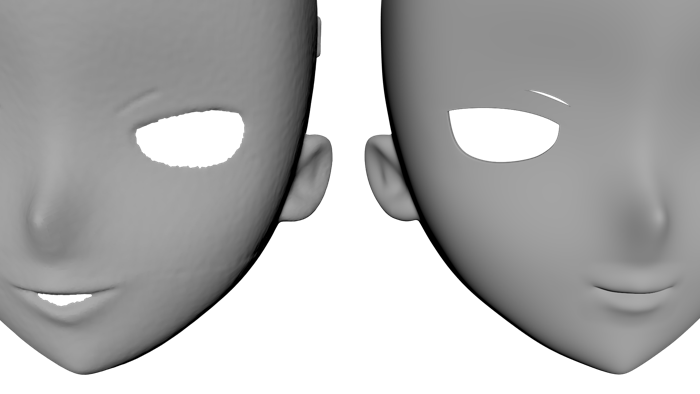
Lastly, as we could not find someone to 3D scan for us, we ended up looking into 3D scanners ourselves and purchased the Revopoint Pop 2 scanner just after it launched. Whilst we have managed to get some good results out of using it, we found that it can be hard to use and can only scan a small area at a time. Our best results came from scanning the mask in 2 halves, splitting the scan between the bottom of the face and the top of the head, with the mask also being painted white to ensure the scanner can detect the surface of the mask as well as possible.
We believed having the ability to 3D scan in items ourselves, to a consistent quality, was ultimately the best choice for us, even though it did work out more expensive to buy the scanner than to get the masks scanned externally, as it means we now have the capability to scan in objects as and when we need to. It also opens up other possibilities, like scanning in people to use for digitally testing mask shells in a 3D space, a process that would be far more expensive and difficult to organise without our own scanner.
3D Printing
We have tried many different types of 3D printing, both internally using our own printers and externally with other companies. Simply put, there is no single solution or “best” type of 3D printing for what we do, as different methods are suited for different kinds of components or products.
We have our own large format FDM printer, the Creatly CR6 Max, able to print up to 40 x 40 x 40 cm. Since getting this, we’ve decided that printing entire mask shells using FDM is not feasible due to warpage and the amount of work needed to finish the parts. As such, we haven’t printed many large objects, but have found it brilliant for printing lots of smaller objects at the same time.
It’s perfect for printing the nut holders for backplates, as we can print the parts directly in a colour and as they aren’t visible while the mask is being worn, we don’t need to worry about finishing them at all. Plus, with the large print area we can easily print twenty parts in one print, making the entire process less labour intensive.
We’ve spent quite some time looking into how to get a nice finish on parts that have been printed using this method, but ultimately found that we cannot get a good surface finish without needing to paint the part afterwards, which removes the benefit of being able to print in the final colour. Instead, if we have to paint the part anyway, it would be best to print accessories using a different method to improve both the quality and accuracy of the larger parts.
We haven’t done any SLA or SLS printing internally, due to safety concerns with SLA and the very high setup costs for SLS printing. Instead, we have been working with some external companies that specialise in these printing methods.
SLA, or resin, printing is good at decorative parts that we plan to paint as there is very little warpage, plus the paint will protect the UV resin from aging badly due to sunlight. There are two different options for us to pick from, plain resin or reinforced resin. Plain resin is what people commonly use and is great for very small detailed items, like miniatures for D&D, but it suffers from being brittle. Reinforced resin works well for larger parts and is significantly stronger and less brittle as it is reinforced with glass fibres, so the resulting material is very similar to fiberglass and we have found it to be just as strong depending on the shape.
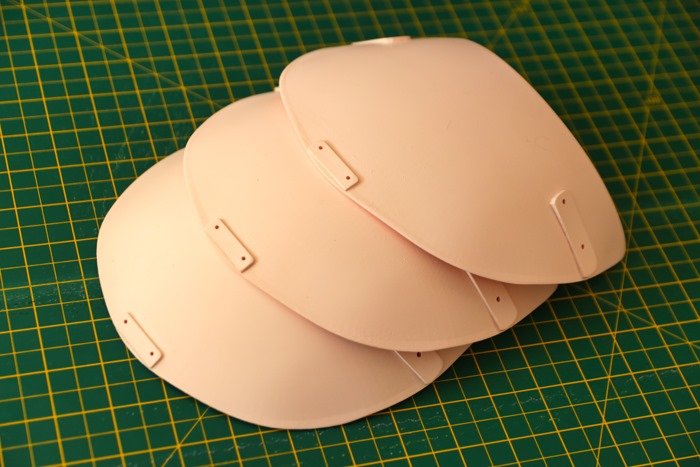
We have learnt a lot through the many years we’ve been printing using SLA and are now at the stage where we are able to design features to be printed correctly using this method, whilst also ensuring that they are quick and easy to clean up after printing. A lot of this has been trial and error, but as many people might not realise, we have been using SLA printing in final products for a while now; the backplates are printed using this method, with all holes pre-cut into the 3D model to improve accuracy and reduce production time.
Despite resin printed parts are known for being weaker, we’ve found that the reinforced resin has solved this issue. We have performed various tests, including dropping painted backplates from ceiling height onto the corner of a table, dropping an unpainted mask shell from head height onto wooden flooring and standing on mask shells, none of which have left any visible marks or damage.
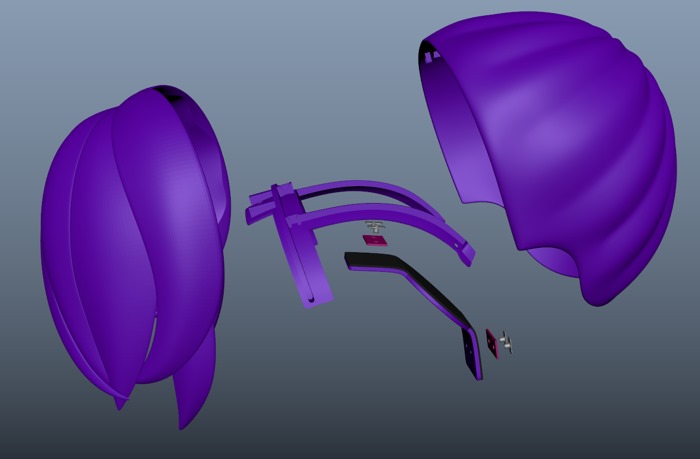
Lastly, we’ve found SLS printing to be a useful option to have, though haven’t found many uses for it yet. We are using it for some accessories soon, where we are concerned that resin printing might not be the best option due to how thin the accessory is and how likely it is to get knocked and damaged.
We have previously testing various items, including the glasses for Grell, using this printing method and while it is very lightweight and partly flexible, it’s less accurate than SLA/resin printing. We do have plans for future products where SLS printing might be a solution to making them, but none of our current products use this type of printing.
Production Methods
As stated before, whilst 3D printing falls under this heading, we thought it was such a large topic that it deserved its own section. We have tried some of the different production methods we previously highlighted, to vastly different levels of success, but have not tried either Roto Casting or Vacuum Forming. The issue with Roto Casting is that we don’t believe it’s that applicable to our products, as there are more suitable methods to use that’ll produce a better end result, so we have never tried to make anything using it before.
Whilst Vacuum Forming is something that we want to try, and we’ve have nearly brought a vacuum forming machine multiple times, we’ve always decided against doing so in the end as like Roto Casting, it isn’t the most suitable method for making the products we sell. It cannot be used for anything decorative as a thermoplastic is used, meaning it will easily warp and any paint applied to the material would soon start to crack and fall off. We have thought about other uses, such as for parts that aren’t as visible, but have always found there to be other production methods that better suit our needs.
So, now onto things we have tried, we’ll first cover the large red flag on this list, Injection Moulding. We have tried Injection Moulding, but the project fell through. For anybody who has been around a while and remembers when DAME first launched, it was our Kickstarter that focused on using this method. Kickstarter was used to raise the initial funds needed to create the mould and first batch of mask shells, but once it was clear that it was not going to work, we instead changed to producing masks using a method we were more familiar with using the remaining funds, as we wanted to ensure we still fulfilled the rewards to backers as it was their generosity that allowed us to test this production method.
We began working with a doll making company in China as they manufacture BJD dolls using injection moulding, so we thought they were the perfect company to reach out to and work with to make our masks, which is very similar to a large doll head. They have a lot of different colours and managed to find a perfect match to the MWF skinsuits, meaning that all masks would match skinsuits without needing to be painted.
They worked on making the mould but ran into various issues, though instead of being up-front about this, they decided to lie to us about progress while they worked to resolve them. In the end, they seemingly decided to give up and the project was dropped. Some mask shells where produced, but many of them were failures and the one shell to pass visual inspection then failed being scanned to look for internal issues. Unfortunately, we were never sent this mask shell, so we cannot comment on how well it turned out, and this piece of unique kig history has sadly been lost.
The main issue with injection moulding was the complicated shape of a mask, making the mould overly complex, but also the amount of plastic that needed to be injected in one go to fill the mould before any of it started to set. We did make some changes to our design to make it work better with injection moulding, namely turning it into a half mask instead that used a cap (which we were planning to Vacuum Form) to turn it back into a ¾ shell, but this was seeming not enough to make the project successful.
The method we have had far more success with is Fiberglass Vacuum Moulding that we have now been using this for a number of years to produce all of our generic mask shells. This has allowed us to make the masks around 300g lighter, whilst also being stronger and more uniform than the old hand layup method.
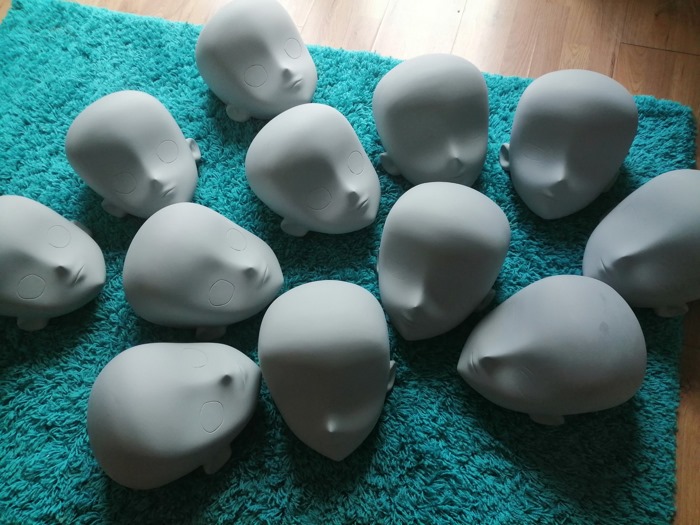
We have changed how the mould is made as well, to better suit this production method, though in doing so we have spent a lot longer working to finish the original master mask to a much higher level of quality. This has resulted in the quality of all generic masks being increased while significantly reducing the amount of time needed to sand a mask from days down to hours.
The main downside to both of these production methods is the moulds taking a lot of effort and money to produce, making it hard for us to add in new variants. This is why we currently only have three different mask styles with limited customisation, as it helps to work around this limitation without needing to spend unreasonable amounts of time and money just to add one or two new features.
Conclusion
We have looked into, evaluated and tested many different production methods trying to find what works best for us as a company, ultimately discovering that there is unfortunately no one way to do things. There is not a correct path or a single route that we should be focusing on, rather it is best for us to learn a large range of different methods and utilise them where we can to achieve the best results.
We have successfully managed to blur the lines between the digital space and the real world, though even then it’s still down to us to pick the correct tool for the job, as there is still no one master tool or workflow that can be used for everything we do or want to do.
In the next blog post, we’ll be looking to tie all this together, explaining how it has helped us evolve our products and designs over the years, as well as go into where this journey is taking us in the future.